Some people learn by reading but others do not. So I include lot of pictures with the text to help those others.
In the previous blog post I showed how to use a chain saw to prepare bowl blanks for mounting on the lathe. In this post I show the steps for mounting the blank on the lathe and turning a bowl. Specifically I am going to show how to make a natural edge bowl. In natural edge bowls the outside or bark side of the blank will become the rim and the inner side ( heart wood) will become the base.
Natural rim bowls have visual appeal and certain advantages. Since the outside of the log is curved the natural rim bowl will have an undulating edge going from high to low and back again. It also will have bark on the outer part of the rim, provided it stays on, and a ring of lighter sap wood with darker heart wood in the center of the bowl. This gives strong visual contrasts which many feel are attractive. Since the rim is already curving, any warping of the bowl rim as it dries will be undetectable. Finally, the bowl can be turned and dried in a couple of days while a cut rim bowl may take months to dry and then has to be remounted to the lathe and turned again to hide the warping that inevitably occurs and achieve the final wall thickness.
For some, having the two higher sides of the rim in the same plane and the two lower sides of the rim also in the same plane are desirable. It gives a feel of balance. So I am going to assume this is the desire in this piece and will show how to mount this blank of cherry wood to achieve that end.
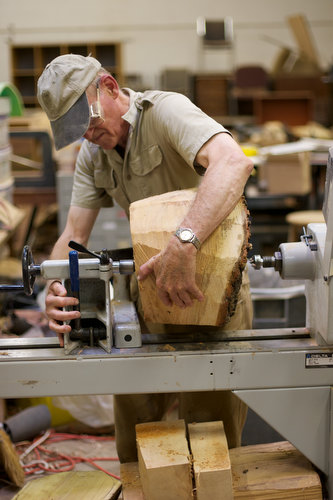
Here I have brought the blank to the bed of the lathe. My first job will be to determine the plane of the axis of rotation to give the effect mentioned above. If I just mounted a faceplate to the flat side in this picture the high sides of the rim would not be in the same plane. That also goes for the low sides of the rim. Note that I have not added the faceplate yet but am going to turn this blank between centers. To do this you need a large spur drive center in the head stock and you need to cut away the bark in the center so that the spur drive center can grip into the wood and not spin in the loose bark. First I fit the drive center into the hole in the bark on the outside of the blank and then draw the tail center up to the other side to pin it securely.
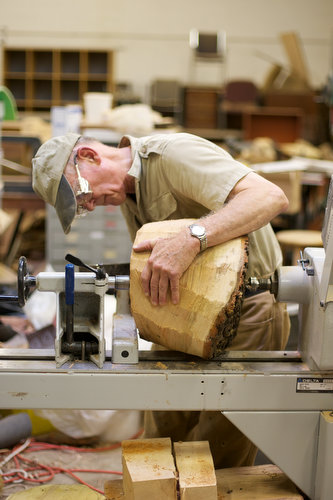
Here I am pinning the tail stock into the heart wood side of the blank. This is just a temporary fix and much adjusting will be needed.
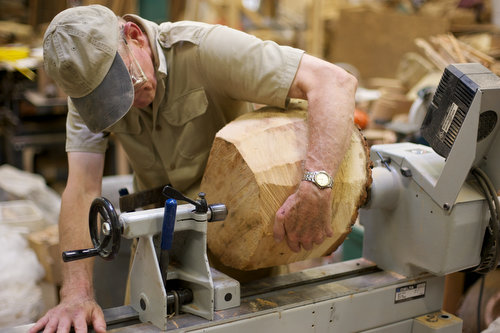
It is not just a matter of putting the tail stock into the center of the circle that is the base of the blank. In this job it would be nice to have four arms but I have learned to make do with two. The blanks may be heavy and awkward.
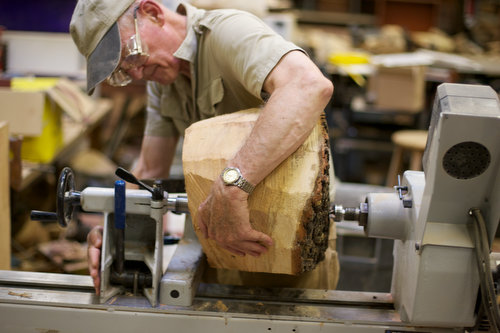
Now I have the tail center in the approximate location and am ready to clamp the tail stock to the lathe bed.
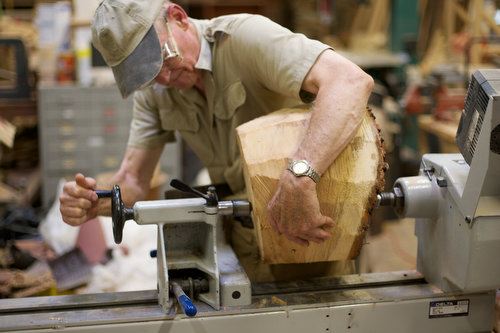
Here I have clamped the tail stock to the late bed and am ramming the tail stock into the blank to hold it securely.
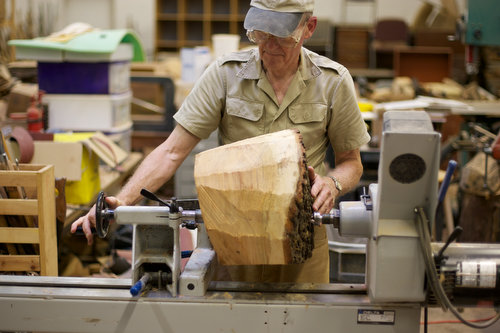
Now I am ready to turn the blank by hand to make the final adjustments.

From visual inspection I have determined that the flat plane of the heart side of the blank made with the chain saw is not the plane I want. Here you see that I have changed the angle quite a bit by lowering or raising the position of the tail stock.

Using my finger as a fixed reference point I slowly turn the blank between centers and see if I can get the higher edges of the rim to lie in the same plane. I make adjustments by either raising or lowering the position of the tail stock center on the blank at the heart wood side of the blank. It is a trial and error exercise and it may take several adjustments to make the satisfactory change. Here is where an extra set of hand would come in handy.
Once you are satisfied you have the high sides of the rim adjusted properly then you need to do the same process for the lower sides of the rim. Once that is done you need to go back and check and make sure that both high and low sides are properly adjusted and make any slight changes that are needed. Now you are ready to prepare the foot so that it is completely flat and in the plane that is perpendicular to the bed of the lathe.
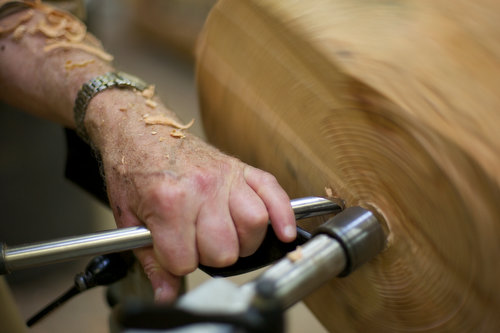
As you can see from this photo and the one below that significant amounts of wood needed to be removed to true up the base allow the face plate to sit flat on it.
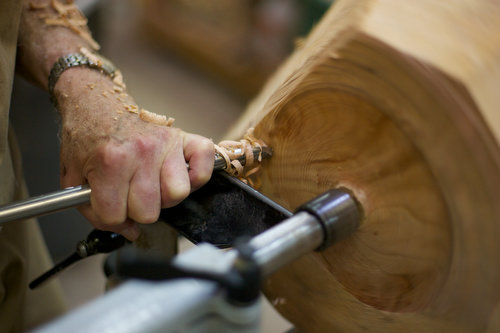
Here the truing up process is just about complete and the blank is ready for removing from between centers for faceplate attachment.
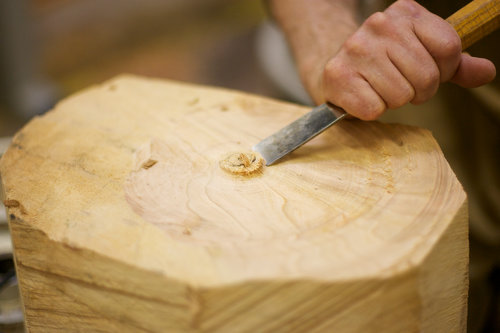
Here I am using a wood carving gouge to remove the button of wood so that the face plate will sit flat on the base.
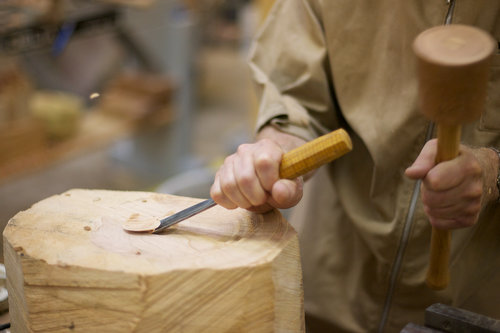
I like using a wooden mallet on the wood handled gouge. This is one that I made which has a head made of dogwood. It is a very hard wood but does not damage the wood handle of the gouge.
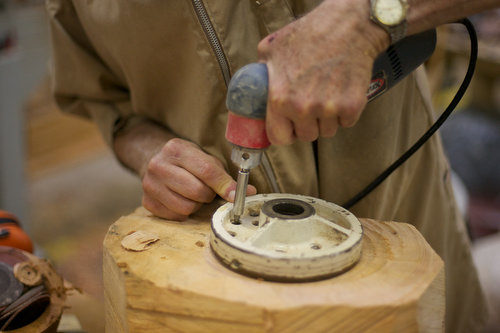
Now I am using a power drill to mount a six inch face plate to the heart side of the blank. I really like the Souix angled drill shown here. I find it more ergonomic for this use as well as for bowl sanding. Everyone has their own preference for fasteners. Frankly, I just use sheet rock screws as they are cheap and quick. I have tried thicker screws, stainless steel screws and just keep coming back to the sheetrock screws. To compensate for the reduced holding power of these screws I just use more of them. I prefer the square drive screws. It is a good idea to measure the amount of the screw that will protrude from the faceplate. This will tell you how much wood must remain waste wood on the bottom side of the bowl. There are other ways of getting around this problem such as having the base go inside the circle of screw holes but for now we won’t go into that.
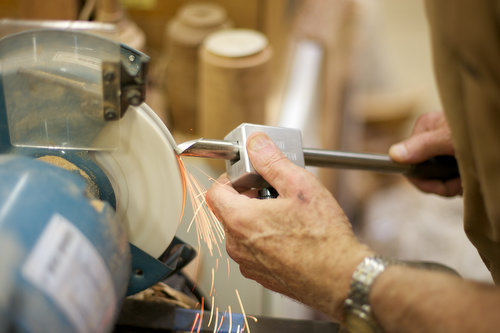
Here I am sharpening my 5/8 inch gouge with an Ellsworth jig. I find the Ellsworth grind the most satisfactory one I have used. You will find a description of David Ellsworth’s book in other blog issues I have written on this site.
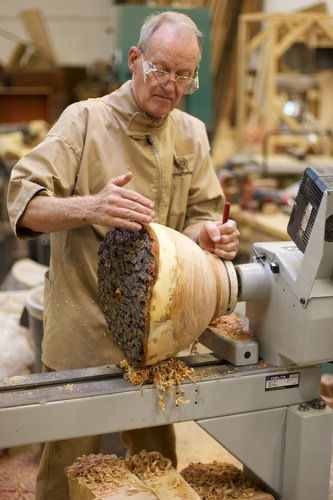
Now the outside of the bowl has been finished.

Here I have started to turn out the inside of the blank. When using a large blank, the banjo of the tool rest will not slide under the blank. That means that you have to think ahead. When doing the outside you need to slide the banjo all the way down to the head stock before screwing the face plate and bowl blank to the lathe. When you want to do the inside of the bowl you need to remove the faceplate and bowl blank from the head stock and slide the banjo towards the tail stock and then reattach the face plate to the head stock.
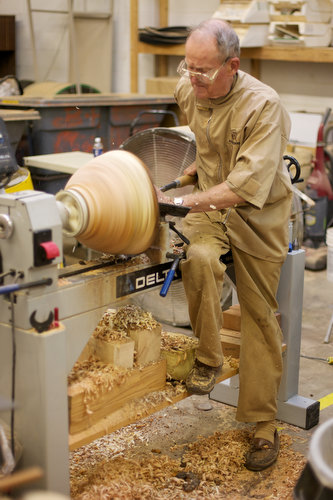
Here I am sitting on the lathe bed as I hollow the inside.
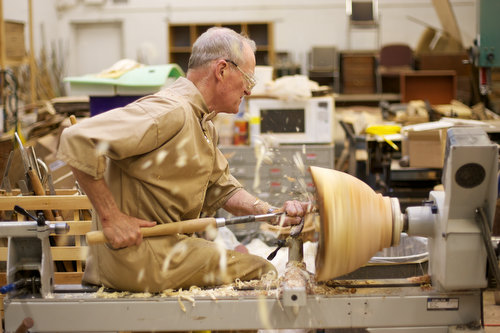
Here is more of the same with the chips flying. Turning wood which is wet allows for more aggressive cuts as the wood is softer (by 40%) when wet.
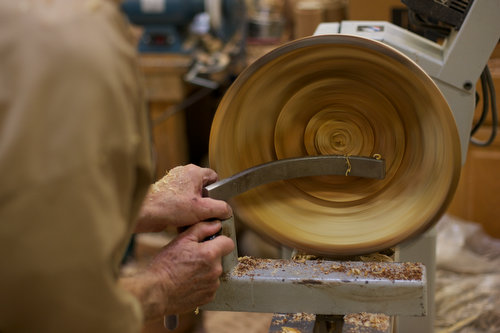
As I go deeper into the bowl I switch from the straight tool rest to a curved one so my gouge is supported closer to the cut I am making. It is safer and easier on the turner as you have greater mechanical advantage from a longer lever arm. The tool rest is the fulcrum and the closer the fulcrum is to the cutting end of the gouge the greater the mechanical advantage.
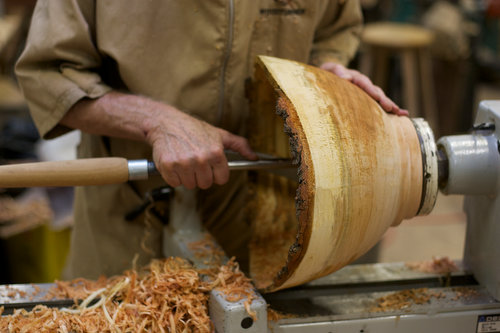
Here I am measuring the depth by placing a straight rod, in this case my gouge, to the center bottom of the inside of the bowl. It is good to sight down from one high rim to the other so that you get a true reading of the depth.
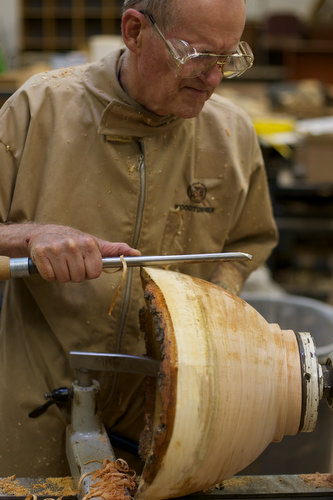
I place my thumb on the exact point of maximum depth and then take the gouge out of thebowl and using my thumb mark transfer the depth mark to the outside of the bowl. Then I make a mark on the outside of the bowl to indicate how deep the bowl is on the inside. As I cut the bowl from the face plate this will keep me from making the parting cut too shallow or too deep.
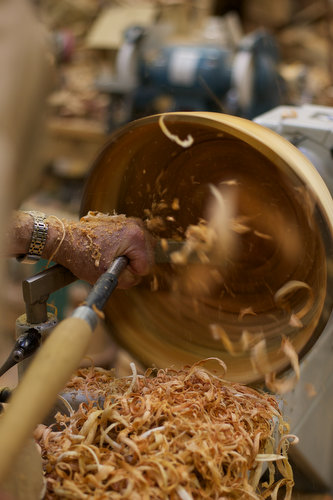
Here I am making a cut to the final uniform thickness of the bowl wall from the inside. The outside was already set before we began to turn the inside. It is very important to have the bowl wall thickness uniform in order to avoid checking of the wood when it dries. Some will check no matter what you do but if the bowl wall is thin and uniform, very few will check has been my experience.
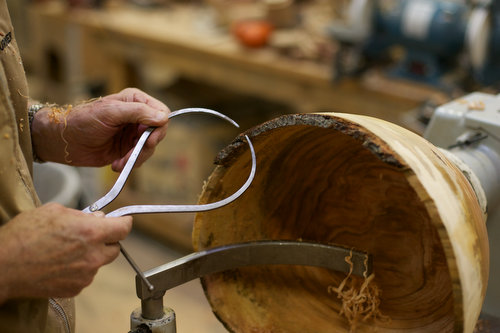
Every time I am too lazy to use the calipers, I regret it. Here the calipers are set at a known width and slid down the bowl wall, with the lathe off. When it begins to hang you know that more wood needs to be removed at that area. Trimming cuts like this need to be done gently. You cannot replace wood you have turned away.

Measuring of the bowl wall thickness is now complete. Notice that in some areas of the rim the bark has come off. When this happens I remove all the bark. If it all stays on I leave it on. Some people love the bark left on for the added contrast. Others feel it is too impractical to use around food. The bark edge is somewhat delicate and can chip off. However, it is not too delicate or it would not have survived being cut to a narrow width with a gouge while spinning at 500 rpm.
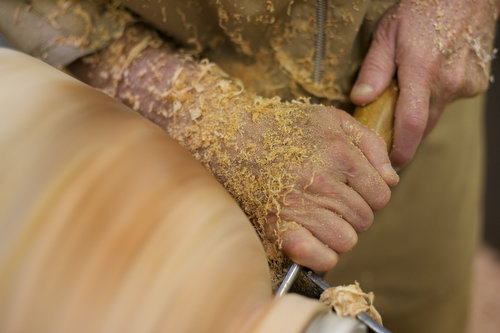
In this picture I am removing some waste wood about the base and getting ready to use a parting tool.
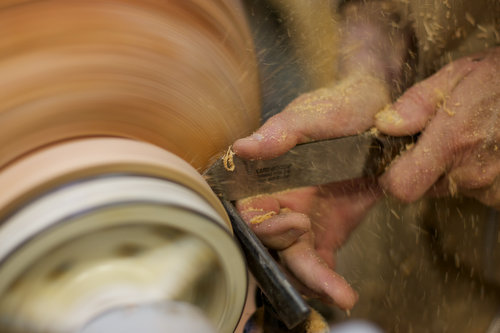
Here I am using a thin parting tool to remove the bowl from some of the waste wood into which the face plate screws are lodged.
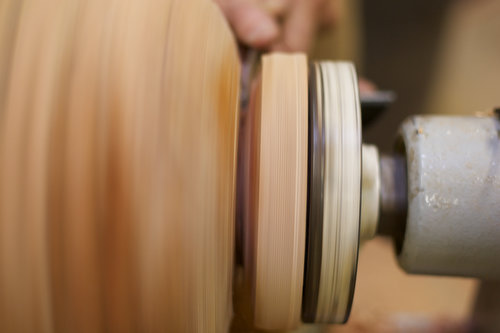
This is a trick I learned from a master bowl turner named Fred Williamson. See the article on Fred williamson’s bowls elsewhere on the blog. I will not complete this cut for several days. However, I cut in deeply enough to leave only 1 to 2 inches of wood of the base of the bowl still connected with the waste wood with the screws attached. How deep the cut depends on the size of the bowl and the size of the faceplate being used.
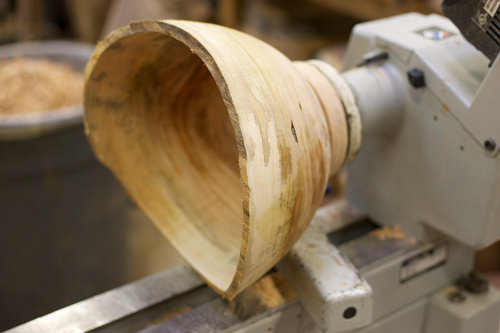
What this step accomplishes is to separate the bowl base from most of the still wet wood in the waste attached to the faceplate. I will leave the bowl just as you see it now. In one to two days it is dry enough on the surface to begin sanding. I use my Souix drill with sanding pads to do the rough sanding. If you have ever tried to hold a large curved bowl in your lap to try to do this sanding you appreciate how nice it is to have the bowl still rigidly attached to the lathe so both hands can be used on the sander. Working near the base, the lathe can even be spinning slowly to speed up the sanding process. So the one or two inch plug at the bottom is enough to hold the bowl on the lathe but still most of the wet waste wood has been separated from the bowl so that the bowl base can dry evenly.
I am very grateful to Fred for sharing this technique with me. If you have several faceplates then you can have multiple bowls drying for several days while you continue to turn more bowls from wet wood.
When you have completed the sanding of the bowl on the lathe then just cut through the plug that holds the base to the faceplate with a hand saw. This is safer for me than parting off a large bowl with the lathe spinning. If you use a saw, be careful how you angle the cut so that the saw teeth do not cut into the base of your bowl. Sanding will finish the base so that it looks professionally done.
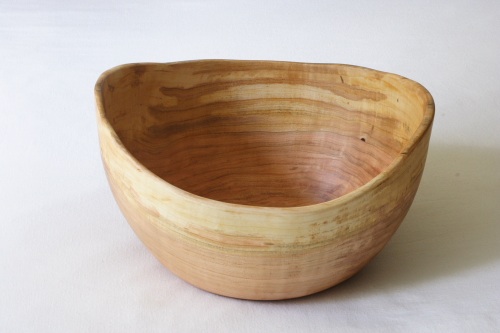
Here is the finished bowl. All the bark has been removed and the rim has been trimmed with a pattern maker’s spokeshave and sanded smooth.
To finish my bowls I sand through grits 80, 120, 180 and 220. Then I spray with dewaxed shellac (I use Bullseye brand in an aerosol can available from Klingspor) to seal the grain. Since the shellac has been dewaxed it is compatible with any other kind of finish including oil finishes. Sealing with shellac keeps the oil stain from soaking in the end grain and oozing out later to spoil the surface. I sand all the shellac off starting with 220 grit and then progress with 320, 400 and 600 grit. At this point I apply tung oil. I get a food-safe grade and dilute it with mineral spirits so it will penetrate. I use anywhere from one to four coats of tung oil waiting 24 hours between coats. More coats give a deeper looking finish. Then I like the bowl to dry for a month or more and then use the Beale buffing system I have described in earlier blog posts. This starts with a coarse abrasive and ends with carnauba wax all applied with a buffing wheel. This is a real labor saver and results in a low gloss sheen. I am not in favor of shiny plastic appearing finishes.
Everything is easy when you know how. With the ability to show text and graphics, it puts the skill of wooden bowl making within the reach of anyone who has the proper equipment. Woodworkers have been generous to share their skills with me and I am pleased to be able to pass them on to you.
Edwards,
have enjoyed your expert tuition!As you know there are many ways to skin a cat.I am having trouble with natural edge projects in that the high points usually end up thicker than the low points.Any tips on how to remedy this?
Regards
Alan
Dear Alan:
The first hundred thousand of these are the hardest. They say you have to make several hundred ugly bowls until you can make a beautiful one. Well, enough of the silly comments although they do contain an element of truth. Let me share what I have learned.
The higher rim gets thicker than the lower rim of the bowl from repeated cuts. You should strive to reduce the overall thickness of the side of the bowl to below the lowest part of the rim to perhaps an eighth or sixteenth of an inch from where you want the final thickness of the wall. Then sharpen your gouge carefully. Now the aim is to hold your head so that you sight right down the inner rim of the turning bowl. Now take one continuous gouge cut to the final thickness of the rim all the way down keeping the cut parallel to the outer curve of the bowl. That means that waste wood needs to have been already removed from the area of what will be the lower rim and a bit below. Otherwise you will not be able to make a cut from the upper area of the rim to the lower area of the rim in just one pass. When you try to remove too much wood you just get a catch or the lathe stalls.
It is the repeated cuts entered lower down from the highest part of the rim that tend to go too deep. You end up with an acceptable rim thickness at the hight point of the rim but it becomes paper thin at the lower area of the rim. Ask me how I know this. I have done it hundreds of times.
So the key is to get to approximate thickness all the way down to below the lower rim. Then sight very carefully and run your very sharp gouge on a course that is exactly parallel to the curvature you established on the outside of the bowl and try to run that cut continuously all the way down to below the lower rim. The more times you have to go back and recut below the higher rim the more risk you have in making the cut too deep. Your eye is focusing below the upper rim and you lose perspective of the outside curvature you are trying to match.
It just comes with practice. The more bowls you do the more even you will get your wall thickness. I have learned that an expert tends to be very critical of his work. He knows where the defects are and tends to point them out to others. It is really not necessary. What I have learned in giving my bowls as gifts and selling them at shows is that
what you see as a glaring defect is not even noticed by others. So just do the best you can and strive to do better with the next one. In time you will even be able to satisfy your harshest critic, which is yourself.
One of the great joys of the internet is to be able to reach out and share what you have learned the hard way with others so they won’t have to struggle as much as you did. Hope this helps a little.
Sincerely,
Edwards Smith
I’m trying to make a natural edge bowl with one end much higher than the others. The side opposite the high side is the next higher side and then the other two are opposite each other and perpendicular to the two high sides. I’m trying to cut as much material away as possible but it still looks scary. I’m using a old piece of black walnut that has a lot of potential. I jsut do not want to screw it up. Any and all suggestions will be greatfully accepted. Thanks and God Bless, Dave McHuron
Dear Dave:
Our first instinct would be to saw a log in half and then screw the face plate to the flat sawn surface of the bowl blank. However. the plane of the saw cut may haven nothing to do with the plane of the high and low sides of your natural edge bowl.
Here is how I have been taught to do it. Put your bowl blank between centers before worrying about the face plate attachment. With a spur center in the head stock at the exact center of the blank bring up the tailstock and screw the ram against the other side of the bowl blank. The curved part of the blank (the natural edge) will be facing the head stock and the flat sawn side of the blank faces the tail stock.
By hand slowly rotate the blank between the centers. Note if the high sides of the natural edge pass past the same fixed point. You can use the tool rest and your finger resting on it as a reference point. Odds are they are off. So loosen the tail stock enough so you can lower the higher side until it passes through the same reference point as the other high side. Leave the spur center in the same place and adjust by moving the blank against the tail center. You may have to make several adjustments and measurements. Now when you turn the blank between the centers by hand both high sides of the blank should pass by your reference point on the tool rest in the exact same plane. So far, so good.
Now turn your attention to the low sides of the bowl. If you want to turn some of the excess waste wood off
by cutting with a gouge with the wood turning between centers that is fine. It sometimes helps you see the lower
sides of the natural edge more clearly. Now repeat the same process you used for the high sides by loosening the tail stock and shifting until both lower sides pass through the same reference point on the tool rest. Again it may take several tries to get it right.
You are almost there. Now go back and check the high sides again. Moving the axis center may have moved the high sides out of alignment. When both high and low sides are aligned the way you want them then screw the ram of the tail stock in tight and true up the sawn side of the blank so that the new surface is perpendicular with the imaginary line connecting the two high sides and the two low sides. When you have a large enough area trued up to accommodate a face plate then remove the blank and attach the face plate securely. Now your bowl will have high sides of equal height and low sides of equal depth if that is your aim.
Edwards Smith