As an avid turner I may turn a hundred bowls a year. Turning the bowl, either wet or dry is pretty straightforward. However, when you remove the finished bowl from the face plate or the four jawed chuck, remounting it to turn the foot is another matter.
The key thing here is to get the tail stock in the exact center of rotation when the bowl was reversed and you finished the outside and inside of it. Now you have removed the bowl from what was holding it and need to get it to spin on the exact same axis of rotation but with the bowl reversed so you can finish the base of the bowl and the foot, if any.
If you are not successful in this, when you try to blend the foot with the body of the bowl, there will be unevenness where the curve of the bowl meets the new curve of the foot or base. One side will be high and one side will be low. It won’t sand out easily either. So I would like to take you step by step through the method I have found works best for me.
First of all, I use jam chucks. I know about vacuum chucking but at this point in my career I just don’t want another piece of apparatus with a long learning curve attached. Jam chucks are so simple, easy to use and durable. Nothing to break or get out of adjustment.
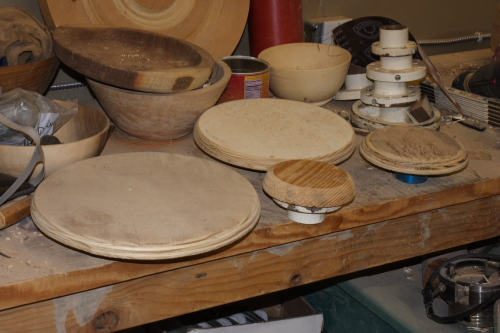
Here is a selection of jam chucks I use. First I purchase inexpensive aluminum three inch face plates. To these I screw a piece of 3/4 inch plywood cut in a rough circle. I put this on the lathe and true up the circle with a gouge and then turn a curved bevel on the edge which will fit into the inner curvature of a bowl. I have several sizes to suit the size of the bowl being finished.
Here is the back side of the jam chuck showing the aluminum face plate which has been screwed to the plywood. These are much less expensive that the Oneway steel face plates I use for mounting bowl blanks to the lathe for initial turning. Since there is no great strain on the jam chuck it does not need to be so sturdy.
This is how the jam chuck will fit into the inside of a bowl Ordinarily the inside and exterior of the bowl would be finished but I didn’t have one handy when I took these shots. So this bowl has yet to be finished but the principle is the same.

Now we see the jam chuck mounted to the lathe and the bowl to have the foot finished being shoved by the tailstock against the jam chuck with a pieced of foam between to prevent marring of the a finished surface and to prevent slipping and heat scoring of the bowl interior.
So this is how a jam chuck works. You use the tail stock to press the outside of the bowl against the jam chuck which fits inot the interior of the bowl or object. It could be a box or a hollow turning just as easily. You turn off the excess wood of the tenon and then remove the last little plug with a saw or chisel and sand flush. If it is a dovetail base then you turn off the dovetail and blend the curve with the base of the bowl. In this case you may be left with a hole made by the tail stock center.
That, too, can be sanded off if you left enough wood in the center.
The important point is to get the center of the tail stock center into a spot which is the exact center of the axis of rotation of the bowl which was established when the bowl was turning the opposite way before it was removed from the face plate or four jawed chuck and reversed. I f you don’t find the exact center then the bowl will wobble and the gouge cuts on the foot will not blend with the curve on the upper part of the base.
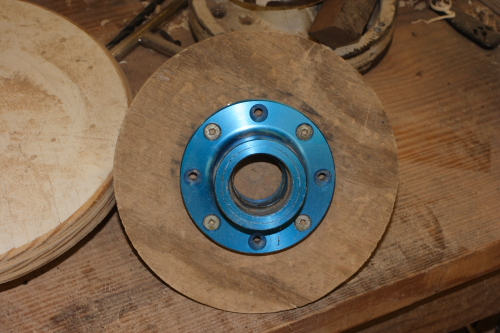
Here we have a walnut bowl. Instead of having a tenon on the base which would be held in the chuck, it had a recess turned in the base. The chuck jaws have been lowered in the recess and then the jaws expanded into the dovetail recess cut in the base. Whether the bowl was held by a tenon or by a dovetailed recess the tenon has to be removed or the recess has to be blended into the base of the bowl to create a nice finish on the bottom of the bowl.
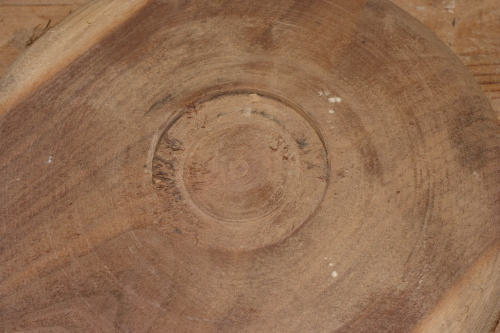
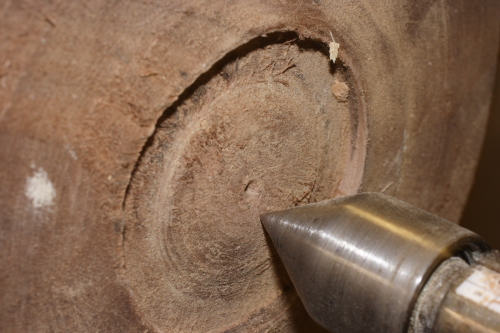
Here is the base of the bowl and you can see the dovetail recess.
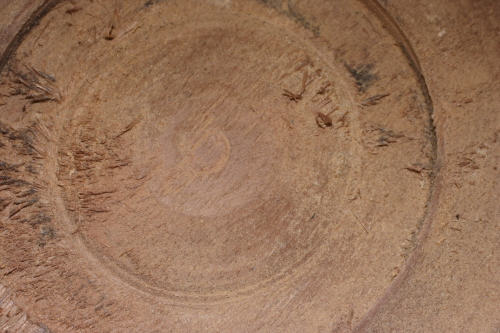
With more magnification you can see that the exact center of the recess is not apparent. To pick a spot would be just to guess. and with the slightest error you would get a wobble. I have seen very experienced woodturners use trial and error methods over and over and even resort to pounding on a vessel to try to get the tail stock center to get in the right spot. You do this enough times and you scar the area around the center and it becomes harder and harder to find the exact center.
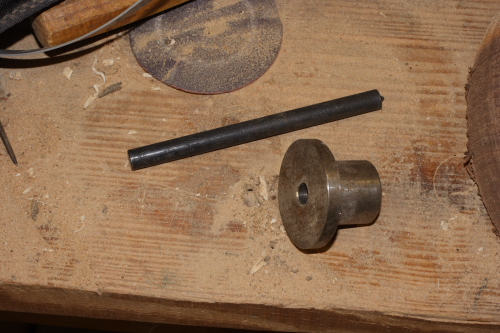
Here is a device that is simplicity itself. It makes quick and easy work of finding the exact center of rotation of the vessel in one step. It consists of a turned steel cylinder with a wide flange on top. This has been machined to fit exactly into the same hole in the four jaw chuck as the threads on the drive center of the lathe. I use Vicmark chucks and the fit is perfect. I also use a Nova chuck and the fit is a bit loose on that one. So to get around this I put a couple of turns of painters tape around the cylinder until it fits into the hole in the chuck snugly.

The smaller black steel round is made to fit exactly into a hole milled into the larger steel cylinder. You can see from the picture above that this has a small point on the end.
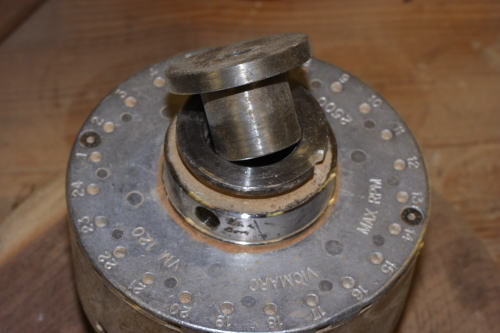
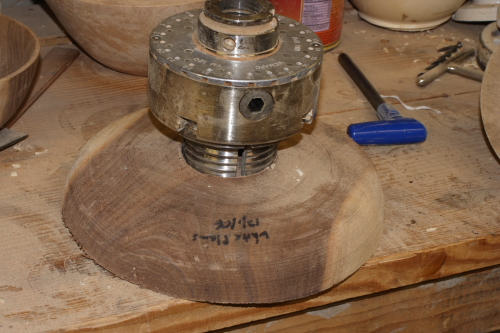
Here the cylinder is about to be inserted in the base of the chuck.
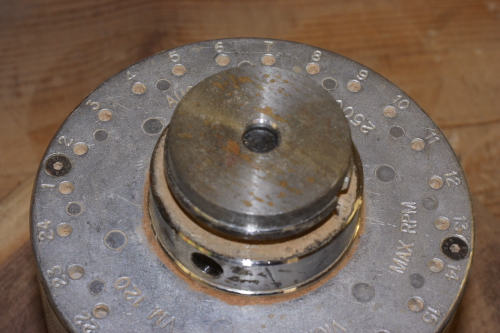
Here it is fully seated with the inner rod with the point inserted in it. Since this bowl did not have a plug tenon turned on the base but rather a dovetail recess the pin drops below the level of the insert. No matter. If the pin is above the surface of the insert I just give it a knock with a wooden mallet. I use wood to keep the head of the pin from spreading which would happen if I repeatedly hit it with a steel hammer. You can see that if the head was spread then it would not seat properly when the striking surface was low as in this example.
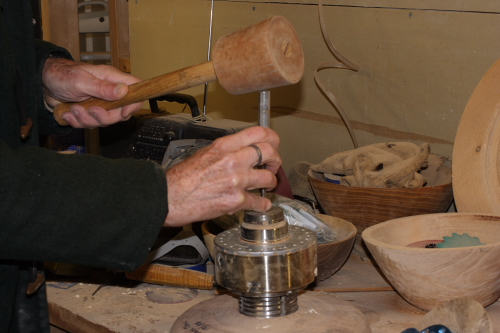
Here I am using a drift pin to strike the pin which will leave the center mark on the bowl. This allows me to strike a blow even thought the pin is below the surface of the insert.
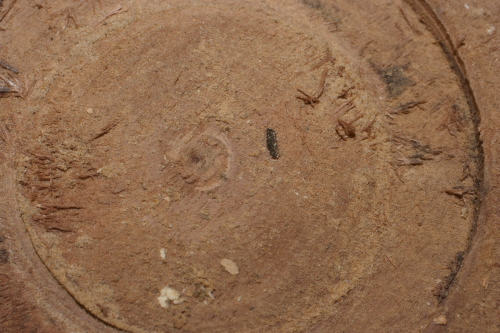
Now the jaws of the chuck have been removed from the bowl bottom and you can see the dark shadow cast by the dimple made by striking the pin in the previous step above. Note that the exact center is not where you think it should have been using visual clues from the base of the bowl.
In this picture I have mounted the bowl against the face plate which is attached to the drive center of the lathe headstock. I have deliberately pushed the tailstock against the bowl base to hold it for the picture but have not centered the point on the tail stock in the hole punched by the center finding apparatus. I wanted to show how clear the marking is for the center point. From this angle we get more shadow and contrast than with the picture where we were looking face down into the hole which was shown previously.

Here the tail stock has been firmly mounted into the exact center of the bowl.

Once again here is the jam chuck with the bowl centered exactly on its axis of rotation. The foam insert between the jam chuck and the bowl makes the fit better and prevents friction marks and scarring by the face plate twisting against the bowl inner surface.
I turned on the lathe and the bowl turned perfectly on its original axis and there was not the least wobble. With this the foot can be finished and blended in with the base of the bowl without a trace of where the two curves met.
I purchased my center marker from Craft Supplies several years ago and have used with pleasure ever since. (www.woodturnerscatalogue.com)
I have learned over the years that if there is a tool you like it is best to purchase it now rather than wait. When you are ready the tool may no longer be available. This has happened to me enough times to make me sensitive to this point. When everyone has the tool, the sales collapse and the manufacturer turns his attention to something new. After all, this tool will last a lifetime.
Some of the very best tools are simple, easy to use and save you huge amounts of time and save you from frustration over the years. This, in my opinion, is one such tool.