
Back last summer one of my TM students, who is also a collector, asked me if I would turn a chess set for him. I was very flattered by his offer and said I would look into it. About nine months later I finished the job.
Now I don’t know much at all about chess. I started to learn the moves when an Eastern European yard man gave me some instruction when I was about ten. It never went beyond that. So, how do you design and execute pieces for a game about which you know very little?
One of my champions has been my son. At age four he told his Montessori teacher that his Dad could make anything. Since then I have been accepting new challenges without bothering about the fact that I really did not know how to do the job at the time.
Another great influence on my life was a Mr. Tom Hodge. Possessing only a high school education, after a career at NASA, this man went on to build his own machine tool shop which was so sophisticated that he ended doing work that NASA could not do for itself. When I knew him as a patient in Newport News, VA, his modern machine tool shop was 50,000 square feet.
He told me that people would come in and ask him if he could do a certain job for them. He would invariably say yes even though he knew nothing about the job to be done. He said he would think about it, sleep on it, get information from all the sources he could find, talk with the experts he surrounded himself with in his shop and begin to try this and that. Eventually he would come up with the finished product. Often it was something which had never been done before. He showed me an example of this one day. It was a railroad car filled with measuring devices. It was towed behind a train at 90 miles an hour and would give you a reading of the track conditions every ten feet.
I greatly admired this “can do” attitude and have tried to implement it whenever the chance arose. So, the first thing to do, it occurred to me, was to get more information. My attention was led to a very valuable resource. Mike Darlow is a professional woodturner and woodturning educator. He has authored many scholarly works of woodturning and woodturning design. It was just my luck that he had recently published a book called Woodturning Chessmen. Sounds like he wrote it just for me.
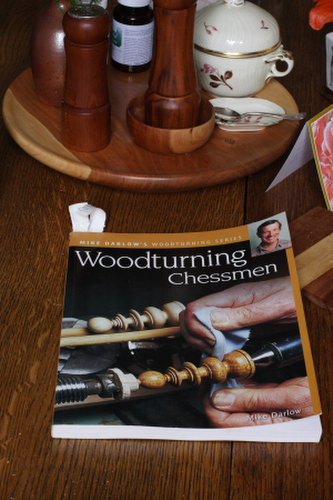
In his usual scholarly way, Mr. Darlow went into the history of chess, tracing its origin back to ancient India where it had been designed at a teaching exercise about the art of warfare. He showed the evolution of the chess pieces from India, through the Middle East and then up through Eastern and Western Europe culminating with the “standard” Staunton design that is so popular today. Staunton was an English chess enthusiast and champion who desinged the pieces that bear his name in the middle of the nineteenth century.
Mr. Darlow not only presented chess men designs over the past 1500 years, he also devoted many pages to the principles of design according to his point of view and many pages to the actual construction of the pieces. It was a real treasure trove and everything was at my fingertips in one volume. After reading this very interesting book I loaned it to my friend and student who had commissioned the work, and asked for his feedback which he duly gave me. I was interested to see if any design particularly appealed to him.
It was very kind of him to suggest that he wanted me to come up with my own design. He suggested certain ideas which he liked better than others but hinted that he really wanted me to be original. Being a collector, originality was high on his list of desirable qualities.
So, what does being original mean? What is truly original? You know that old saying that there is nothing new under the sun. I personally believe that there is a field of unmanifest reality in which resides all forms and ideas in seed form. I think that when we are creative we are just remembering those seed ideas. Some have more access to that level of reality than others. Yet, if that is unfamiliar to us, then we don’t have to look far. Those same seed ideas are repeated over and over in nature. Since they are the blueprints of nature, we see them in all that we see. Therefore it is a bit presumptuous for us to take credit for what nature has already created.
After giving this a lot of consideration I think that what we mean by creative and original is how we put together the parts of what has already been created. Even that may be debatable but at least it gives us credit for some level of creativity or at the very least the ability to “see” those combinations in our mind’s eye.
On the other hand, my client’s order for originality put the burden on me. It would be relatively easy just to copy one of the many patterns in Darlow’s book. So what it boiled down to was how do I see the game of chess as reflected in the turned pieces. My reasoning was that as a game of war strategy, the pieces should reflect that reality. The pieces should be “writ large” and the flavor should be masculine. This left out the many intricately turned rococo pieces of the late 17th and 18th centuries illustrated in Darlow’s text. Even the Staunton standard pieces failed to capture that flavor, in my opinion.
One of the things I have learned is that the creative process is not to be rushed. Mr. Hodge would take a lot of time to think and sleep on his ideas before completing a job that had not been done before. So I began to turn these thoughts over in my mind. The first decision was the choice of wood for the pieces.
Most would agree that in war there is one side that tends to represent good values and one side that opposes them. The Mahabharat is the classic epic in Indian Vedic literature in which a ruling family had turned against part of itself in pursuit of less than honorable goals. This epic is very dominant in Indian culture and probably lay in the awareness of the creators of chess. Therefore, one set of men needs to represent the good and the other side opposition to good. In other words there needs to be a clear color contrast to represent that idea as well as to be able to tell the pieces apart on the board of play.
Now some woods are more turner friendly than other. Some tend to splinter and tear out under the tool’s edge and others remain firm. So, I thought to myself, what wood would best suit the side aligned with goodness? It needed to be light colored and at the same time have a rich appearance. My choice was holly. It has almost no grain appearance. Being an evergreen it grows slowly year round and does not produce the soft early wood and dense late wood seen in a species like oak or pine. When carefully finished it looks almost like ivory or stone. It has a very regal appearance and it is almost snow white.
For a contrasting darker wood my choice was cherry. Cherry is one of my favorite woods to turn. It handles well, is hard and uniform in texture. It has a lovely rich color which slowly darkens with exposure to sunlight. The more it is handled, the prettier it gets. Thus the light holly and darker cherry would give good color contrast. Some makers resort to making the pieces of a light wood and painting one set black. My feeling is that black draws the wrong kind of energy to it and I prefer to avoid black whenever possible.
With the choice of wood settled, now I had to decide on the size of the pieces and their size relationship with each other. My client had some specific ideas about this and I went with his instructions. The king was to be about 3 3/4 inches tall.
With the dimensions established, it was time to prepare the wood blanks. I am always starting with rough wood. So the wood was band sawn and put through the planer. I would then smooth one edge on the jointer. Now it was ready for the table saw to cut the proper width, height and length. The results are shown in the photo below.
I wanted to add weights to the bottom of each piece to keep them from tipping. To do this I marked the center at both ends and then drilled an indentation in the base with a Forstner bit to accept the lead insert. I had some sheet lead and used a set of gasket punches to cut out discs and drilled the indentations so that the lead discs would just fit. They could then be secured with a drop of cyanoacrylate glue.
Now I had to start coming up with specific designs. As I looked through Mr. Darlow’s many illustrations, I became aware that there was no single set in which all the pieces appealed to me. I realized that each piece would have to fit in my “wholeness idea” of being severe and somewhat war-like.
So I started at the top with the king. After several experimental trials I settled on the design.
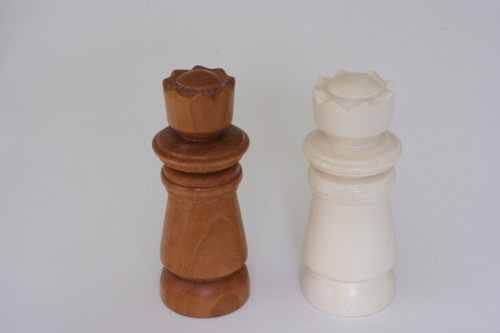
Then followed the queen. It had to be apparent that she represented a feminine form but I still wanted her to fit in with the overall design which was solid and substantial.
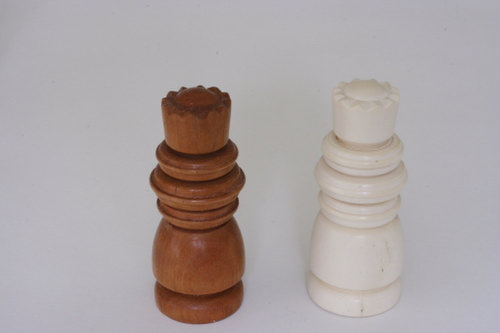
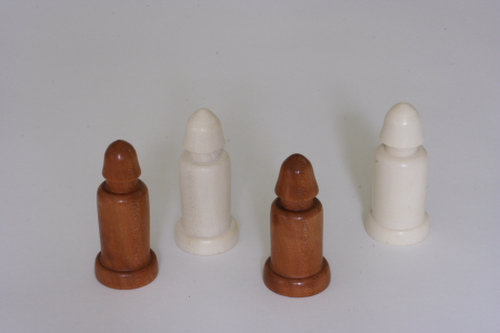
Going down the scale of rank I next turned to the bishop. In the Staunton set he is shown wearing a mitered hat. However, clerics also wear other hats and I saw some represented in Darlow’s book and adapted one to my taste.
The knight has been represented as a carved horse’s head. Aside from the association with cavalry this piece does not really evoke a war game to me. Again I saw a small head with a armor helmet with a small vision slit in Darlow’s book. I made the head bigger and used it for my knight.
The rook was the final piece and was fairly straight forward.
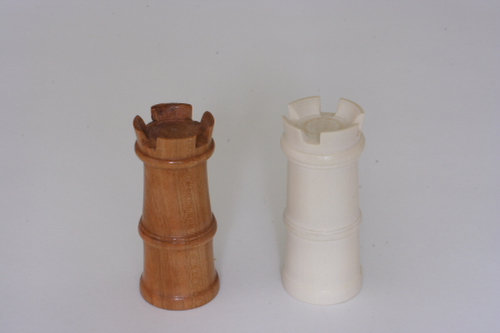
Details of the crowns on the king and queen as well as the openings in the turret of the rook had to be hand carved with a carving knife. One of the tricks I learned from the Marlowe book is to use the indexing stops on the lathe. Before I turned the parts off I used the indexing stops. Keeping my pencil flush with the tool rest I would make a mark on the piece at each appropriate interval. This way all the intervals were evenly matched and then it was no problem for the carving knife to follow the pencil mark to finish the detail on the piece.
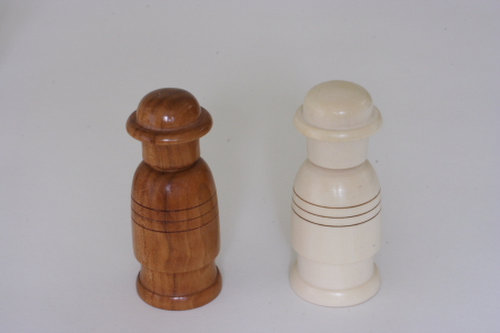
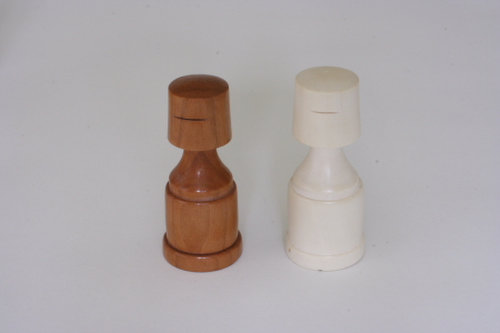
All that remained was to design the pawns. Most of the sets I have seen really do not do much justice to the concept of a pawn. A pawn in a war game is a common soldier. So I settled on small man-like figures with primitive helmets. Now the design was set. I was ready to start turning in earnest.
The first step was to turn the blanks round with a roughing gouge. The picture below represents this step.

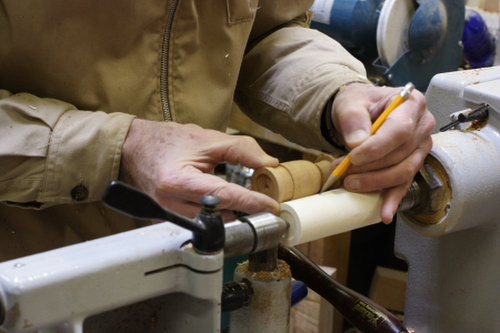
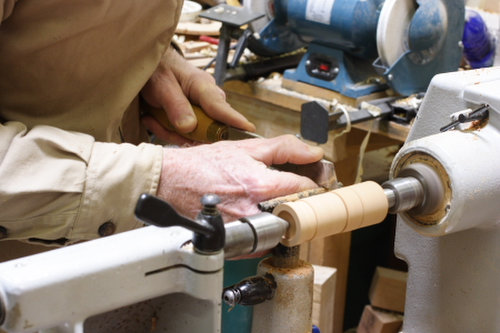
Next I used a pattern piece to mark the critical dimensions on the round blank. In furniture making they use something called a story stick. It is a thin flat piece of wood with the pattern of the piece cut in two dimensions and then meaningful data written on the stick. It is used to lay out marks for sawing out the piece. I have learned from my own turning experience that if you have an original you can lay out the critical marks right on your work piece without having to fuss with a lot of measurements. Measuring is not something that comes easily to my free spirit. So here I am holding a previously turned bishop in cherry against a holly blank and transferring the marks directly to the work piece. This system works very well for me and saves a lot of time. If you ever go back and want to recreate the set or a piece, having a pattern piece saved for that purpose will greatly simplify the process.
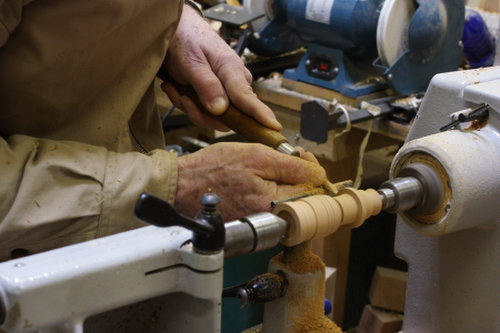
Next I cut the critical marks into the wood with the skew chisel. The skew is a good tool to learn to master. It is ideal for doing many tasks in spindle turning. Like many others I had problems with it. We had a turning demonstration at our local woodturning club (Baltimore Area Turners) and the presenter was Bill Grumbine, a well known turner and wood turning teacher. He was showing us how to reproduce spindles. He explained to me that the real secret is to have your skew very sharp. By that I mean shaving sharp.
After dressing the tool with my Wolverine sharpening jig (with the skew attachment in place on the bench grinder pictured in the background of the pictures) I take the skew and dress the edge with a diamond hone using first the 600 grit side and then the 1200 grit side. Next, I strop the edge with 7 micron diamond paste on a porous strip of wood followed by 3.5 micron paste. I get my diamond paste from Wood Carvers Supply, Inc. in Englewood, Florida. This produces a really keen edge. The tool can be touched up with just the diamond hone and the diamond strop to refresh the edge for many times before the edge needs to be reground.
Here I am beginning to cut the design into the blank.

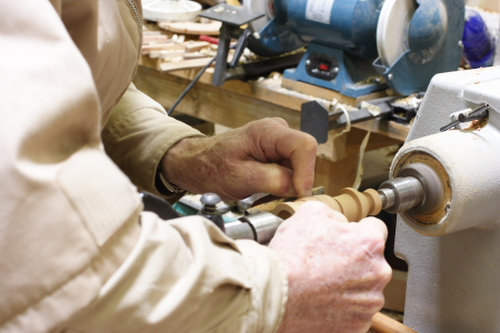
In the picture below I am using a tool I had to design myself. My skew chisels were too wide to fit down in the narrow coves and grooves of the pieces. Some time ago I got some engine valve stems from my local garage. There were smaller ones from passenger cars and larger ones from truck engines. The steel is very hard. I cut off the head and this left me with the straight shank which I fitted in a tool handle and then waited until I had a use for it. When it was needed I used the grinder to make the shape of the cutting edge and then did the final sharpening with the system I described above. Now I had a very small skew to work into tight places.
Another trick I learned from Bonnie Klein I am using below. I wanted some accent lines in the otherwise monotonous robe of the bishop. I first cut these lightly with the skew and then use a wire to burn in the line to make it more visible. You can use most any kind of wire. This one happened to be inside a twisty tie and is quite thin. I have taken wire out of electrical cable or from other sources. You just hold the wire in the grove as the wood spins until you get the darkness you desire. You can buy sets of wire made just for this purpose but it is easy to make your own and the price is right.
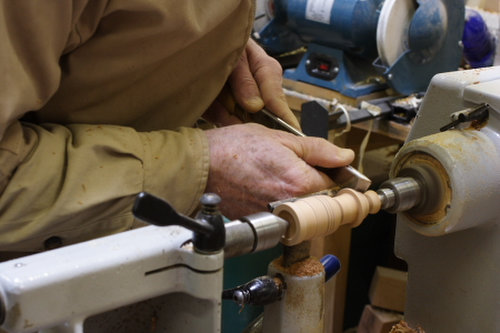
Here you see the finished bishop being parted off with the skew.
After doing the hand carving and final sanding I had to make some decisions on the finish I would use. I did not want to sacrifice the whiteness of the holly with oils and shellac which impart color so I just buffed it with white diamond abrasive and finished with carnauba wax with the Beal Buffing System I have described in earlier blog posts.
With the cherry pieces I followed my usual routine of a coat of Bull’s Eye shellac. After this was sanded down carefully and rubbed with 0000 steel wool, I applied a coat of tung oil. I have found that placing newly finished articles on the floor next to the forced air heating vent speeds up the drying of tung oil and Danish oil products. When good and dry I buff using the three part Beal Buffing System.
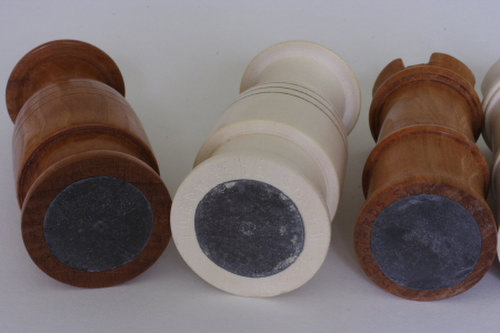
I used my engraver to put my name and date on the bottom of the pieces. This picture also shows how the lead wafers fit into the recess at the bottom of the piece. This system allows the lead weight to be at the lowest point in the piece to give maximum stability.
Here is the finished product assembled.
Doing something you have never done before is a challenge, but it is what leads to growth. It is the nature of life to grow towards more and more. If we stop growing the rest of nature does not and we find ourselves left behind. I guess that is why my friend Cliff Hodge was so successful. He never turned down an opportunity for growth.
I like learn turning and craft chessmen. Can you guide to me? Thank you very much
I would be most happy to help you. It might help if you tell me about your woodworking
skills and equipment.
Hi, My wife passed your site along to me… I just recently bought Darlow’s book about turning chessmen… I plan to do a set in the not too distant future.
Beautiful! I am a teacher and run a chess club here at school. I ‘accidentally’ stumbled onto your site, as I’m trying my skills in wood turning. My students keep breaking the plastic chessmen, and I thought, “Hey, what if..?”
I agree with you that the Staunton Knight is somewhat an over-rated piece and doesn’t seem to fit with the other pieces. I was thinking of using a type of Crusader’s Helm for the knight.
How did your student like the pieces?
Dear Kirk:
Thanks so much for the feedback. Glad you found the blog entry inspirational. It was the design that took the most work for me. Making the pieces was simple. Wood is very durable and ever so much more fun than plastic. My student is a collector and has a number of chess sets but I have not had any complaints from him about the pieces breaking. I hope you turn a set for yourself and your students.
Edwards
I am just about to buy a lathe and start woodturning with my 10 year old son. One of my aims is to get good enough to turn a chess set and stumbling across your site has been inspirational – so thank you very much – I hope I am just a fraction as good as you and I will be happy!
Regards,
Greg
Dear Greg:
Thanks for your kind words. The more you do the better you get. Since chess pieces are small you can afford to
replace earlier trials with better specimens.
Sincerely,
Edwards
I enjoyed reading through your account of the design and production of the chess set. You do not specifically mention how you achieved what appears in the illustration to be a ‘facetted’ crown for the King and Queen. Was this done on the lathe and if so how how did you achieve the effect?
Apologies. I have re-read the blog and clearly I missed a section. To answer my own question – a combination of the indexing system and a carving knife were used.
I am a high school senior that is lreaning to do spindle work for my senior project. For my final product I am making a chess set. I have already designed some of my peices, and I have made almost all of the pawns. I was just wondering if you would have any advice for a rookie turner in my position.
Thanks,
Wes
Dear Wes:
Sounds like you are on your way to finishing your chess turning project. Just keep on turning. You learn by doing and since the wood pieces are small, if you make an error it is easy to start over. Don’t be afraid to experiment. There are as many ways of doing the job as there are woodturners. I have found that when I take on a new project I need to repeat it several times before I am satisfied with the results. For me perfection seldom comes the with the first pass. When I made my chess set I had to make some of my tools as the ones I had were too large. So if you find you don’t have the right tool for the job then innovate and make it yourself. Old files, screw drivers, nails or other scrap steel work just fine.
Sincerely,
Edwards Smith