Wood is such a fascinating medium. Even in the decay process nature brings forth spectacular designs and colors. Spalted wood has been used for many centuries by woodworkers to enhance the visual appeal of objects. The recent publication of a book called Spalted Wood: The History, Science and Art of a Unique Material by Sara C. Robinson et. al. places in one volume all that is currently known about this form of wood. Sara has devoted her academic career to advancing the science of spalting and has collected an enormous amount of information on the subject. It is a very scholarly treatise on the subject and an excellent collection of photographs of spalted wood objects produced over the centuries.
My own interest in the subject has to do with the use of spalted wood in objects turned on the lathe. My first experience with it came from cutting down a tree in my yard in Virginia. It was a maple and I decided the wood was too attractive to burn it. I set it upright on the concrete floor of my garage. Two years later I cut into the log and found it discolored by black lines. My first reaction was that the pretty white wood was spoiled by this fungus attack.Yet as I examined it more closely I found the black lines more interesting as this was a piece of tiger maple and the lines followed the plane of the wood fibers and outlined
the squiggly pattern.
Over the years I have seen lots of spalted wood species. Most of my experience has been with wood with black zone lines. These lines are composed of melanin pigment, the same pigment that makes our skin dark. They mark boundaries to keep other fungal colonies out of that territory which had already been claimed. They are like fences, if you will. Of all the varieties of wood to produce these zone lines I have found silver maple the most dramatic.

Spalted Ambrosia Silver Maple
This is an example of ambrosia silver maple. The wood is infested with the ambrosia beetle who brings the fungus with him. So around the holes he bores developed the discolored wood, mostly in terms of brown colors.
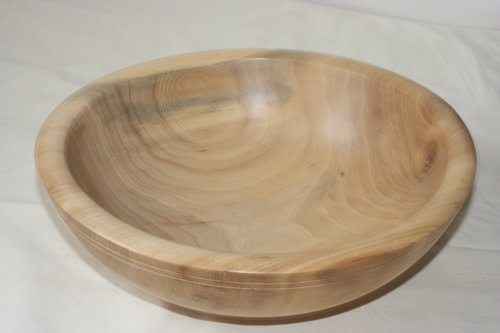
Spalted Siver Maple
This is a more typical spalted silver maple pattern with the dense black zone lines and the white rot contrasting with the darker undigested wood.

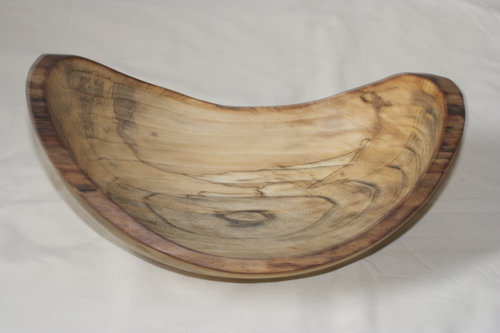
Spalted Sugar Maple
This is an example of spalted sugar maple. I my experience the spalting is more diffuse in this species. You can see a few black zone lines but the color changes are more diffuse.

Spalted Sugar Maple
Another example of spalted sugar maple showing the diffuse changes in the wood. Spalting occurs in many other species of wood. Attractive examples are ash, birch, box elder, beech to name a few.

Box Elder
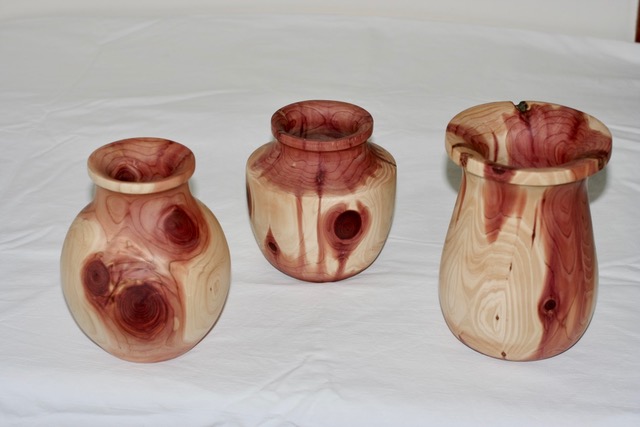
In her bood Sara Robinson points out that many different colors can arise from spalting wood. The chlorociboria species of fungus produces green colors which were favored by European intarsia artists to portray grass or forests. Other fungi may produce red, orange, purple and blue colors. Extracts of these fungi can even be used for creating dyes. However, she pointed out something that I had already suspected. The red color that comes from box elder is not due to fungal activity but is produced by the tree in response to injury.
The dramatic red color of this box elder piece is not due to fungal activity but is produced by the tree in response to injury. If someone would get around to study it they might find that the pigment has some anti-fungal or anti-bacterial properties or yet some other interesting quality.

Spalted Norfolk Island Pine
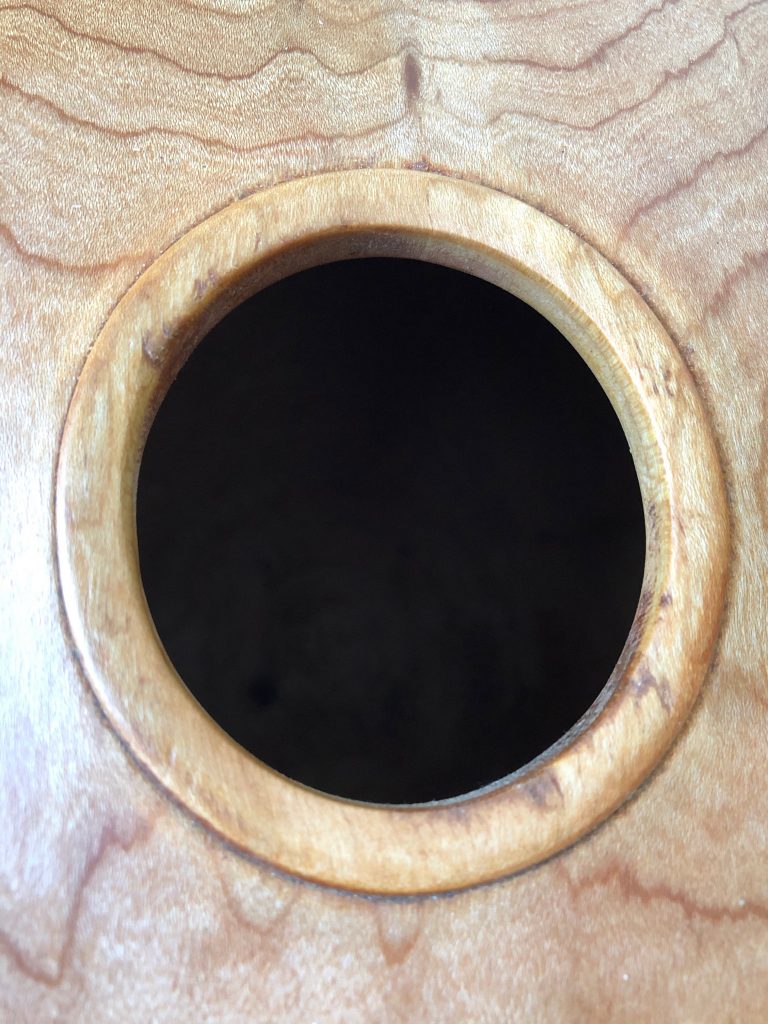
This is a Norfolk Island pine hollow vessel with the characteristic blue diffuse staining of pine by fungal attack. As I had already turned the lower piece of this with the colorful symmetrical knots I almost discarded the remainder but on a whim turned this vessel and found it interesting.
Robinson goes on to tell about how other woodworkers induce spalting. David Ellsworth takes logs and lines them up about an inch apart and then covers them with leaves and leaves them on the ground for a year or so. The practice of coating the wood with chips from spalted wood turnings, coating with beer or other substances Robinson believes is a waste of time. She points out that the fungi eat the easiest food first so these coatings just delay the fungus getting into the sound wood. The fungal spores are everywhere and cut wood comes already inoculated. She does go on to talk about commercial efforts to induce spalting but this goes beyond the turners interest but the information is available in the book.
My own technique for inducing spalting is based on my first experience. Take a log section, set it upright on a concrete slab floor and now I cover it with a plastic bag. You want the wood to stay damp but not soaking wet. Moisture wicks up through the concrete and up the wood fibers at just about the right speed. I leave it there for one to two years and have been rewarded with very attractive spalting.
Turning spalted wood produces some challenges. The wood has been partially digested by the fungal enzymes and it is not as dense. You may have noticed that a spalted piece of wood is light in weight. When sound wood is next to spalted wood it can lead to tear out. Cuts need to be light and sanding may be the only way to get a smooth surface. That surface will be more porous and won’t take as high a shine when finished but the interesting colors in the wood make up for that “defect.”
The easiest way is to let nature do the word for you. Check out wood that has been down for a year or two. Look at dead standing trees. You may find hidden treasures.

Spalted Hop Hornbeam
This was a dead hop hornbeam trunk. In Vermont they call it hardak. I just bored down the center of the log to get this vessel with interesting visual appeal. Hornbeam, also called ironwood, is very hard so there was a lot of tear out but the color contrasts between the white rot and the normal wood was so striking that the tear out is not noticed.
So, most spalted wood has already been created for you by nature. You can assist the process if you wish but don’t fail to discover the joys of working with spalted woods.